|
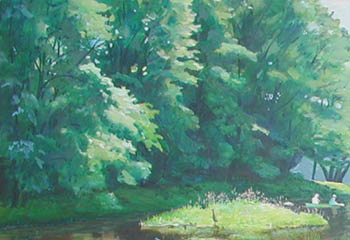
Scaled Mural 12"x25" Fresco
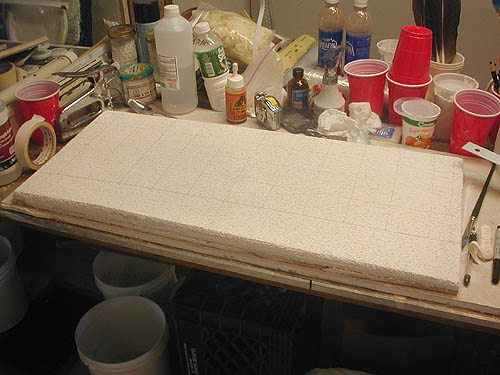
My fresco rough scratch coat on the 12x25 scale board with lath is made with: 1 medium sand, 2 large sand, 2.5 white cement, .5 lime and some fiberglass cuts. = 1:1
The fiberglass is to prevent cracking, I don't think I needed it.
6-10-4, laid the brown coat: 2 medium sand, 1 lime. I forgot the alum.
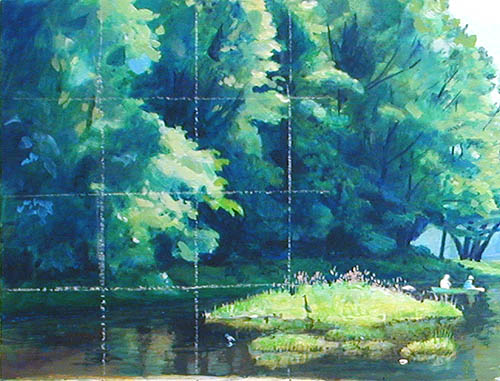
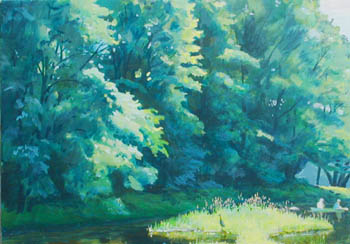
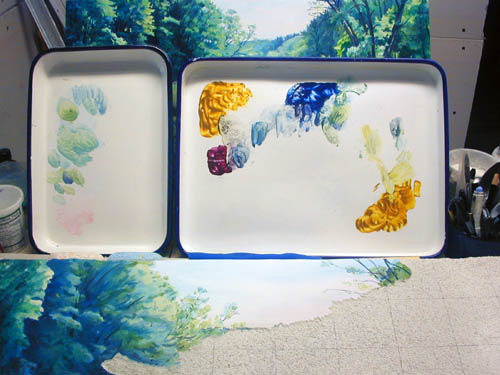
6-17-4 The brown coat is very hard anyway. The cartoon paintings are getting close to being finished. Soon one of them will be painted on this small scale 12x24 fresco panel. I'll be using only 3 colors, the primary colors plus white, transparent yellow, transparent magenta and transparent cyan. The best white is titanium white.
 Giornate, One day's painting area.
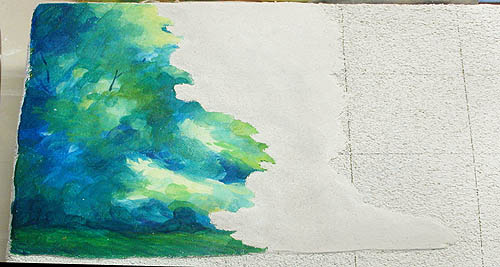
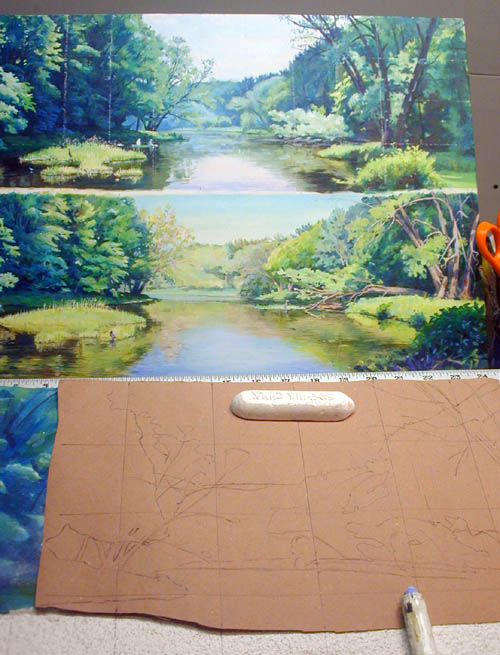
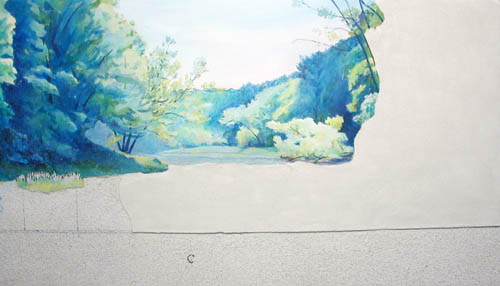
6-13-4, First Giornate on 12x25 fresco, Sunday. I'm starting the first intonaco giornate on the small scale fresco, the bottom 1/4 will be oak panel, for protection. The grid is on both the painting and fresco.
11:00, start wetting the panel. That will give me two hours to prepare the intonaco, lime 1:1 small white sand, alcohol painting medium.
12;00 PM. Later. It's raining, hard, the river will come up to my original level. Today I plan on painting the first Giornata section on the small scaled fresco panel.
6:30, finished with the first intonaco giornate section.
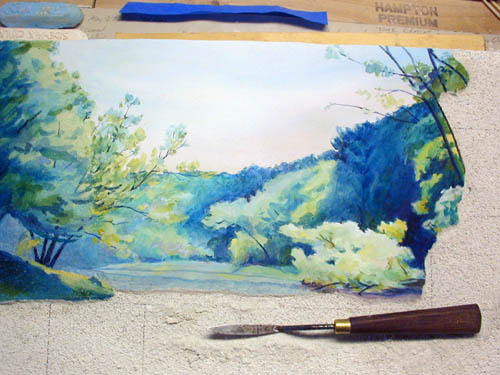
9:30, finished painting, alcohol medium. Alcohol paints very well, it's easy to make a blend with a dry brush. tomorrow the colors should be set. The photo includes the edge plus the little over I will cut to a 45 degree outward angle.
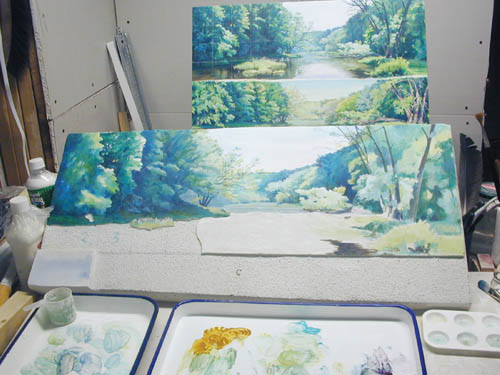
Compare the acrylic and panel grids
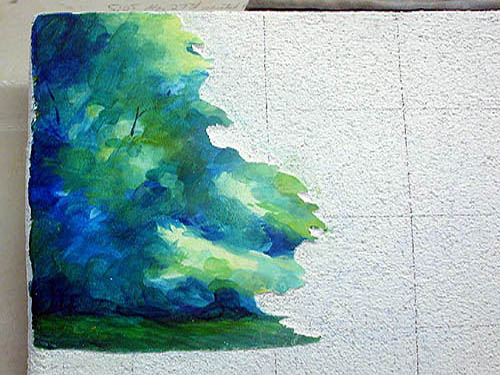
6-16-4, Three days later the colors are in there solid. Alcohol is a good medium on lime, too much alcohol in the pigment will pit the surface.
6-16-4, I chipped away at the right edge where I had changed the acrylic paintings colors. The surface calcium carbonate was hard, the brown coat with alum was harder. It was easy to remove and leave the brown coat intact.
Wet the whole area, mix the intonaco 1 lime : 1 sand, lay the intonaco next to the dry first, the cartoon outer edges should have overage that can be removed back to the cartoon edges, later, wet or dry.
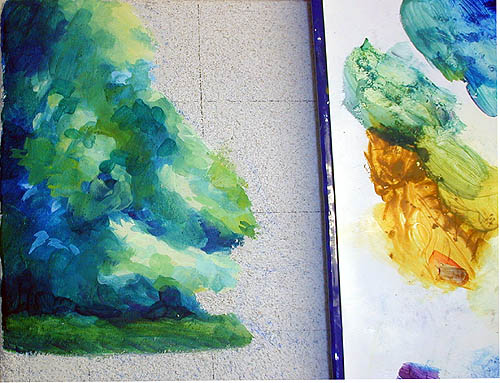
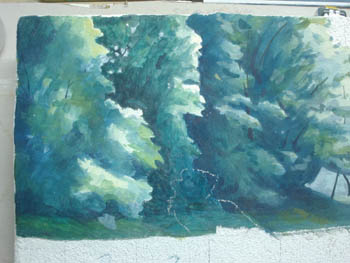
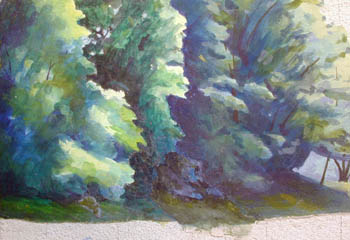
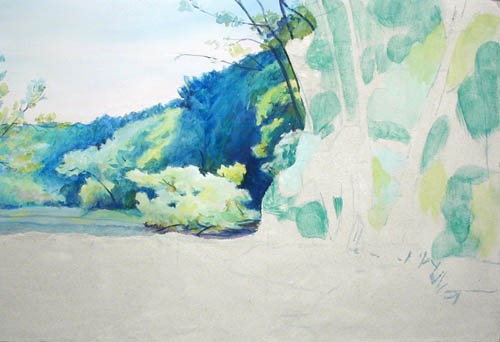
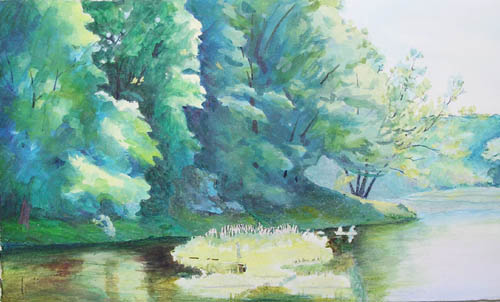
2nd intonaco giornate. During the painting I took this photo. Using alcohol medium and only 3 colors plus white and lime paste on lime intonico.
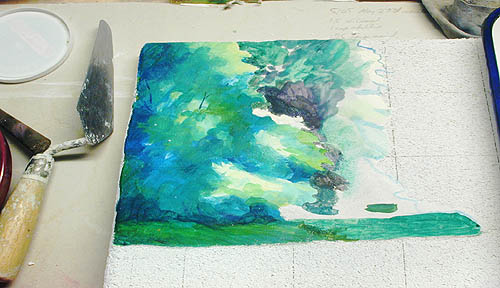
This 2nd giornate is finished.
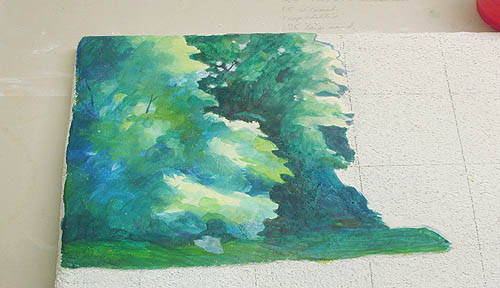
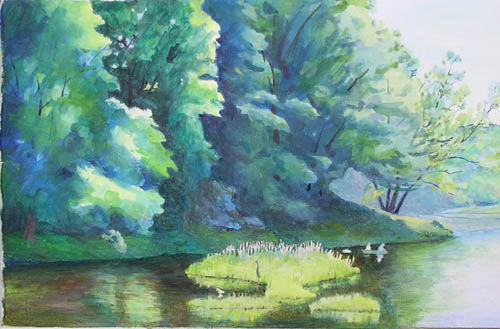
6-19-4, The 3rd intonaco is made of 1 white cement and 1 sand. I painted on it for three hours with alcohol as a medium. Next day all colors were fast.
This is really easy to cover any color with another. Titanium white will cover any dark color, it absorbs completely and you can change back to dark, and then back to light. This is the fresco technique I've read about, and it's on gypsum. You can't change colors as easily in lime, but cement won't make a carbonate crust, it will stay dull unless a gloss is added when it's dry. Alcohol does effect 5% of the surface but it paints great.
Tomorrow I do a cement and sand with a water medium. I know I won't get a good cyan color but I want to get used to the comparison.
RESULT, 7-16-4, a month later all colors are locked in well.
 6-20-4, The 4th intonaco giornate is a small subtractive change to the 3rd giornate . I'm still working on the scale acrylic and had made a color change on the acrylic color model. To bring this change into the 12x24 fresco I cut out the area and laid a new intonaco making a new giornate section. Below is day 19 and day 20 on the painting and the cut out.
   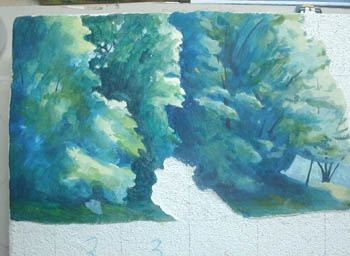
The medium is lime water and the mortar is lime 1, small white sand 1. I won't say it turned out any better, and I won't say you can't feel where it giornate's edges are. I will say the change was easy and that I made two changes not one. Now I know I have to paint big, complete areas. Sorry about the color matching, the last picture is closest to the truth. I lost the picture taken right after painting, in it colors looked fairly close. This picture was taken hours later, the colors have started to change. This is going to be miserable when it's dry. This giornate is the first with all lime, the first 3 were white cement and small sand. It will not get as hard inside.
6-22/4, 5th giornate. Making an outline paper cartoon to scribe onto the intonaco.
6-23-4, 5th giornate on the scale model, the sky. This one is 1 lime, 1 cement, 2 small white sand, lime water medium. Start 2:55, finished laying giornate 3:05. Wait until gloss is gone, re-trowel, paint 3:50. The pigments are absorbing wonderfully, it's the addition of the white cement that did it. It's much better than just lime. The surface is very firm and everything just soaks in. Change any color any time, back to white if you want. Keeping the palette simple yet complete allows you you match any color. I'm really enjoying this. 4:40, finished painting. Now I will cut the edges for the next giornate and finish up the afternoon painting. 5:10 Finished 5th giornate. I don't like the pressed in outlines from the cartoon, I need a better system and I don't want to pounce.
6-24-4, 6th giornate, 9:45. Below the sky, middle third of mural. Start laying the giornate, lime 1, cement 1, sand 2, 10:35 finished laying giornate.
12:35, Lime water medium. 90% finished painting and I'm taking a lunch break, the intonaco is absorbing well and I figure I have a little time to spare. I've had to add cobalt turquoise because I can't get the color cyan with thalo blue and water. I also added Naples yellow for brilliance and viridian because Thalo green only works well with alcohol.
1:30, finished the 6th giornate, I'll cut my new edges.
All and all, isopropyl 70% alcohol paints better than limewater on cement and lime.
3:15, I'm going to do another small area giornate below the lime giornate #4, with white cement 1:1 small white sand and lime water medium painting into the setting cement.
6-24-4, 6a giornate, same day. The pink weed tops with the dark background are intricate and I'd rather match up a giornate cut in the big clump of weeds then waste the time including it in a larger giornate. Also I must decide about which medium to use into wet cement on the big mural.
6:00, still working on the small #6a giornate. I started painting with a water color technique, painting around the pink ends. Now.. I'm thinking the casein or oil technique of painting a light object with lime paste in it on top of a dark background may be faster.
This giornate will not be a separate giornate on the large mural but I'm not sure exactly what the giornate will include. perhaps it will go from the left side, across the water's edge and down the right side of the weed islands.
6-25-4, 7th giornate. This intonaco on the 12x24 will be white cement, 5% lime, alcohol will be the painting medium, painting during the open absorption period, and also after it has dried with an acrylic polymer emulsion. The giornate is from the right top and bottom up to the tree's reflection in the water.
3:30 to 4:25 to lay it. I'll wait 20 minutes and burnish off the shine.
This may well be the final mural intonaco.. with cera colla as the finish gloss. The mural is in a traffic area, it needs to be strong against nicks and knocks. It paints well and by using a water based acrylic polymer or wax as a sealer it can be painted secco.
5:05, still too wet, areas are still shiny and the shine won't go away with pressure yet.
6:30, burnished and ready for paint.
Strokes laid down won't move but you can re-cover them to change or build them up.
8:30, This is the lay out, I drew in the grid very lightly, not the best idea. I should have done it with removable strings. As you can see, not many lines are needed to show the color patterns. Later I just drew the grid lines on the wall with a fat pencil.
9:20, Still absorbing well, take a break. 10:30, still going strong. It's really nice to be able to build color and change patterns.
11:55, Finished painting. It was still absorbing well, I just got too tired to go any farther, this is a very nice painting media. Easier then any other media I have ever used. This was six hours of painting on a very open mortar.
Well.. it seemed open. The pigments I put on in the last 2 hours have not assimilated. I washed it down before I tested it and removed some color from the water area and from the Naples yellow foreground weeds. I'll fix this with pigment and a diluted acrylic polymer emulsion as the medium.
White cement has a 3.5 hour time limit. I don't think it can be extended by spraying with water like lime mortar. Half lime, half cement and one full sand may be the best mortar for this mural.
6-26-4, 8th giornate, 12:00 finished laying 1 cement, 1 sand. Acrylic polymer emulsion can be used as the painting medium, or water with the polymer as a sealer on the dry cement. The giornate will be from the tree's shadow to the bottom left edge.
The pure cement and sand sets up too fast to make any intricate giornate, lime slows it down a little. It's still Buon paintable about the same amount of time as lime and sand but you can't work a color into the mass while braking through the surface to the moist lime intonaco below as with pure lime intonaco..
Steel trowels make a color dark gray fine grain when a lot of pressure on the sharp white silicate sand cement mortar. It has some very small black grit included. I tested this by grinding the sand on a ceramic tile and saw that, it showed up on my intonaco and the bare tile. Crushed limestone or marble is softer and whiter, the better choice for fresco murals. I can't find any on the Northern East coast, perhaps farther south where they build more swimming pools.
I'm using only three colors. But because I'm painting with water thalo blue doesn't give me a good cyan, I need cobalt turquoise to kick it into turquoise, or switch to alcohol.
I switched to alcohol medium, it moves the paint around longer and works with the pigments. The cement draws pigment deeper so painting takes more time. The biggest problem with just white cement and sand it it's fast chemical set time. Of course you can wet it all, shave and press it smooth and lay another fresh thin layer of just cement and press it in and remove the excess. That will make it very smooth.
It is nice to be able to draw with pencil on the dry cement. I still have not made my decision, Secco fresco not buon fresco for this traffic area of this 200 year old house seems prudent. Buon fresco with half white cement would be good option.
The paint sinks in fast on dry cement. While it's sinking in it can be blended very easily. It feels like it's absorbing the pigment when it won't move but it's not really locked in. The last test showed there is a close out time in setting cement and this is on dry cement. The colors are not glued in, I'll wait until it is dry and check before glazing with a thin coat of polymer to seal and lock in the pigments. Dry cement paints just like a 300# newly pre-soaked hot pressed watercolor paper and is just as unforgiving. Soaking a sheet of w/c paper takes some of the internal size out and colors sink in deeper. The paper holds more water so you need a hair drier to keep painting
These colors soak in quickly, until the cement won't hold any more water. I held a hair drier in my left hand so I could lay more washes quickly.
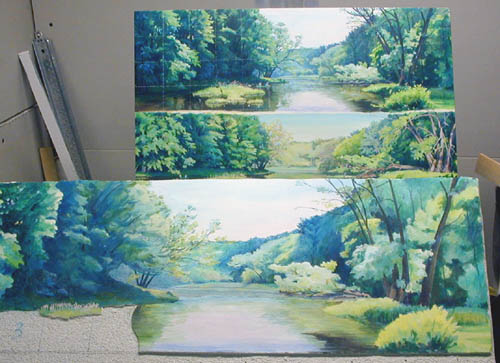
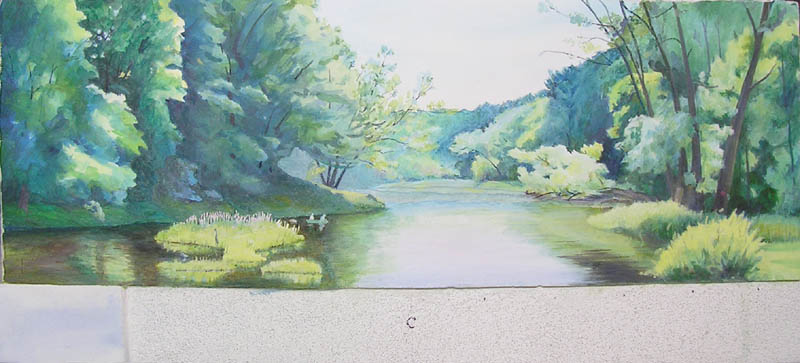
6-28-4, yesterday I dropped my camera and had to get a new one. This is the first new photo, giornate #8 Secco in the half-way stage. One half of the mural.
Finished, tough work, pigment absorbing in dried cement takes a lot longer then just painting on a sealed surface like gesso.
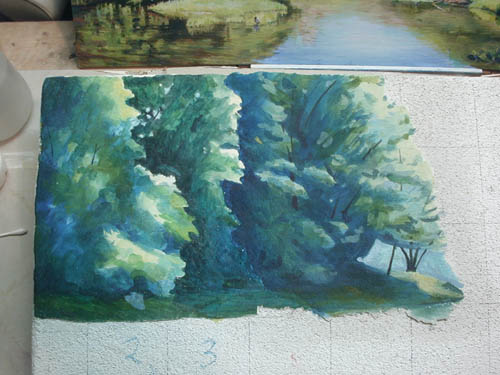
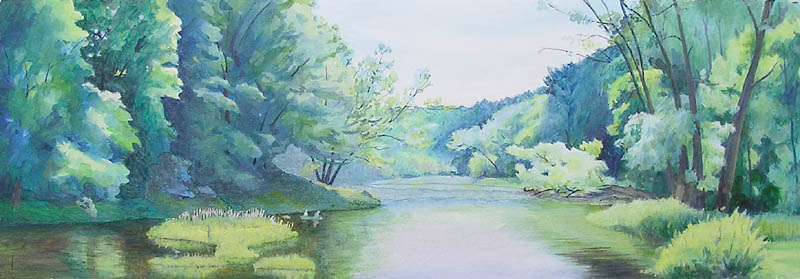
Here is the finished 12x24 fresco, eight giornate cuts. I'm glad I did this scale model, I will change some of my giornate cut lines.
One month later here is the color change. It's not much, about 10% lighter. I replaced the 1/4 inch thick test for the large mural. It's now the same thickness as the rest of the mural, 1 lime, 1 cement, 2 white sand.
I removed the 1/4 inch faux area I first laid and am replacing it with a level 1/8th inch faux marble all the way across the fresco. Later we decided to panel the area with oak for safety reasons.

|