Painting on Location
by Donald A. Jusko
eXTReMe Tracker

Don Jusko, Buon Fresco Mural
NY Little Salmon River Morning

82" X 155" BUON FRESCO

Three primary transparent colors plus white.

fresco1mural-baseRCW.htm

Photo from Pourch

FRESCO PAGE LINKS, new windows
Ordering Fresco Supplies
Half Size Bella Fresco
Bella fresco, secco
Color Chart, fresco, secco
Fresco using 3 colors test
Color chart, main
Color blends chart
Alcohol, ammonia, egg, casein
Jar lime color tests
Mortar hardness
Medium scrub test
Giornate cuts
White undercoat Duracell fresco
Tomatoes, red to magenta color tests
John's fresco portrait
Traveling fresco palette
John's fresco portrait 2
fresco forms and wires
Cad Red, Yellow, Titanium White, Green Earth Test
Metal Lath and Aggregates, Supports Made
Color Tests on Green Earth
Intonaco Time Tests
Making Intonaco and Rough Mortar
Larger 37 Color Chart
Test, blue colors, absorption times
Making Fresco Trowels
Fresco Paintings 1
Fresco Paintings 2
Fresco Paintings 3
Fresco Paintings 4
Fresco Paintings 5
Fresco Paintings 6
Fresco Paintings 7
Fresco Paintings 8
Fresco Paintings 9
Fresco Paintings 10
Fresco Paintings 11
Fresco Paintings 12
Test Mortar and Colors for 82x155 Mural
Full Color acrylic painting as Scaled Fresco Cartoon
12x25 scaled fresco
82x155 fresco preperation
82x155 buon fresco mural base (You are here #52)
82x155 buon fresco mural, cont. 2
82x155 buon fresco mural, cont. 3
82x155 buon fresco mural, cont. 4

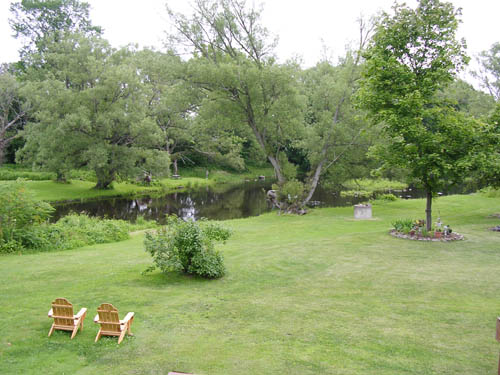
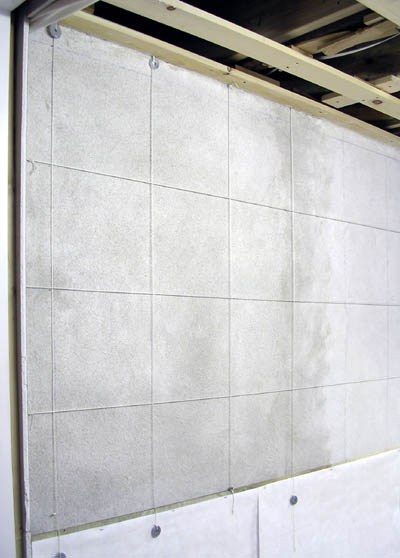
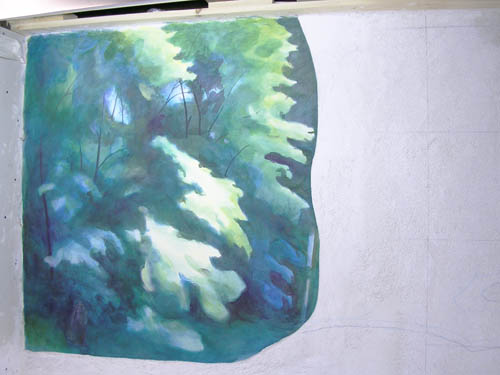
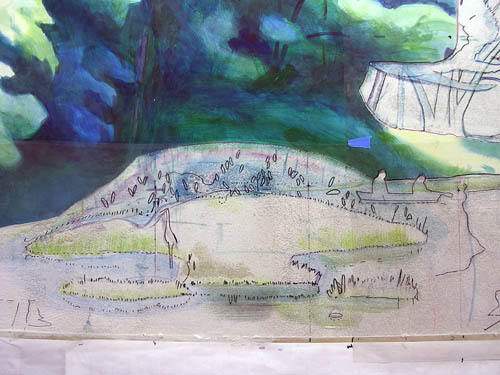
6-29-4, All day today was in preparation to paint on the mural tomorrow morning. I've been wetting the the area since 8 AM. Picking the brushes, trowles, palettes laid out, stringing up the grid lines on the wall and in chalk on the acrylic color layout painting, Wetting and protecting lower faux marble with a cover, watching Maria Sharapova win her match at Wimbledon.

This is the scaled acrylic paintIng I made for this mural. I chose the top morning scene.

acrylic scale painting

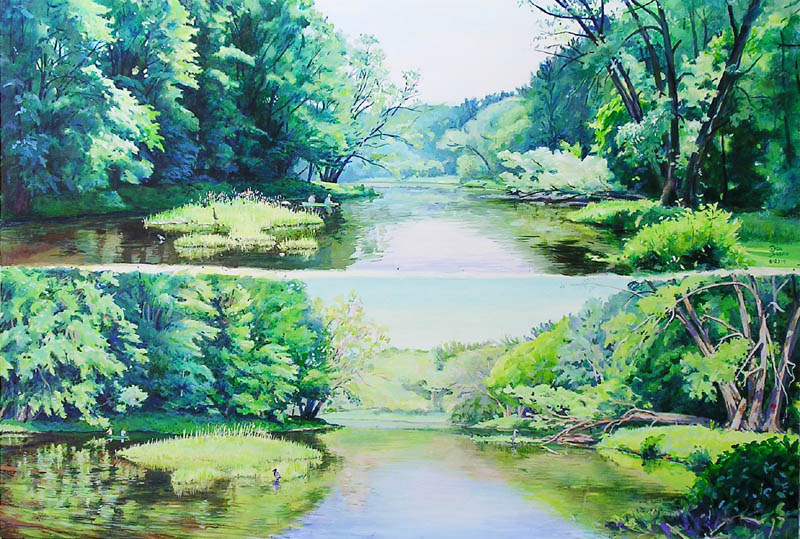
This will be a 3"x3" giornate using three transparent colors plus white. These are the primary transparent pigment colors that make a full color painting. Their mass colors match the transparent crystals of yellow, magenta and cyan including the way they become dark. These are the true transparent primary colors and the basis of the Real Color Wheel. Just as a note, PR122 quinacridone violet, is warmer than PR202 quinacridone magenta. Normally I use PR122 in acrylics and w/c but this is a cool mural and I have PR202 which is perfect to make great blues.

The horizontal and vertical lines are strings, strung as the grid lines. With this grid I can transfer my acrylic paintings' chalk grid.
The strings are removable to lay the intonaco. The intonaco will be 1/8th of an inch or less thick. Soon I will switch to a clear plastic cartoon instead of the string.
Giornate #1, White Cement 1 : 1 wet lime, 2 small white sand, = 2:2. I started wetting down the area yesterday.

This is how I set up the string guides.

6-30-4, 10:45 AM, start laying intonaco mortar. On top of the wet Brown coat I put a thin wet intonaco slip coat on with a brush. Wash them in alcohol or vinegar to remove the lime. By the time this was finished it was ready for the full coat. I used my home made 12" plexie glass blade to smooth the surface.

12:20 AM, finished laying the intonaco mortar. I'll wait until after lunch before starting to paint.

2:10 PM, 100% coverage of color, I'm half way done.
My wrist still hurts from laying the Rough and Brown coats.

string lines


5:30 PM, finished giornate #1. My 1" Langnickle 901 Blitz Fitch brush was the one the flowed the big pigment best. It always was a great brush, I used up my 1/4, 1/2, and 3/4 Series 901 a few years ago, they are not replaceable.

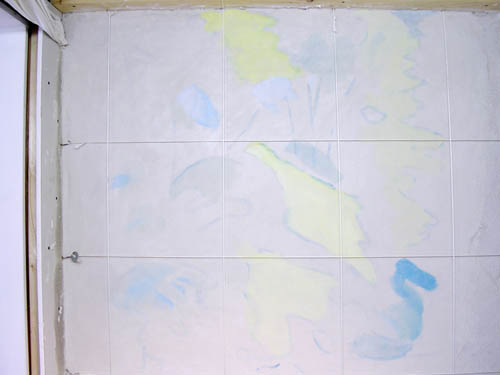
This is the clean giornate #1 with string grids and my transfered outlines.
TIP: Note to myself, make the cut lines early, before it sets, for a smoother edge.

grid and outlines


Hooray! My bag of crushed limestone arrived! Now I will have a white intonaco.
Here is the finished first giornate with the cuts made. It also shows the two outlines for the new gornate. The blue chalk outline is actual, the black out line is water proof and one inch beyond the true outline. The second outline is where I will plaster up to and the one extra inch will be cut off.

grid and outlines


Giornate #2, 1 white cement, 1.5 lime, 2.5 crushed limestone, = 2.5:2.5, 1 lime water.

7-2-4, 9:30 AM, start laying giornate #2, Rub a loose slip thin layer of intonaco mortar on first with a brush dipped in lime water to soften the lime mortar. Spread the intonaco along the old edge first, get that good. Than spread the rest roughly, than a big float trowel or sponge to even it out, then a metal or plexie glass blade to make it ready for pigments.

11:10 AM, finished laying giornate #2. 11:30, Cut off the extra with a pointed trowel while the giornate is wet, so the edges will be smooth, clean off the extra so it won't fall on anything painted. Later I started using a "V" cut. Paint the connected edges first because they will dry out first. Second, cut the giornate lines

12:00 noon, painting


First paint where the dark areas are.


2:00 PM, Finish breakfast. It has 100% coverage, It's hard to build up color fast, these are transparent colors and the washes are thin and they do sink in quickly. The color is dark and 10 seconds later it's lighter. Colors just don't move after they are laid.

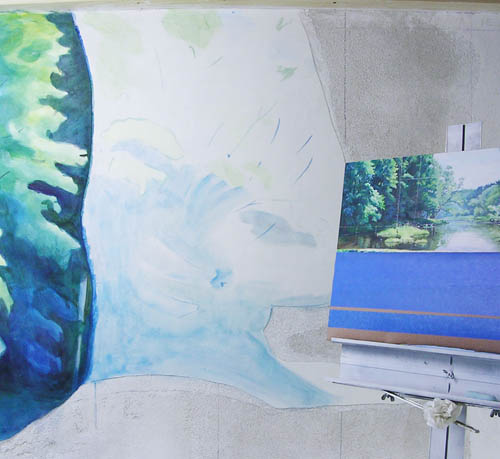
3:00 PM, I think it closed out but I'm not sure, three hours isn't enough.

4:30, Finished 2nd giornate. It's better to make a giornate cut along a pattern color edge than down the middle of a color pattern. Light colors are especially hard to match and the cut shows.

I painted this giornate without my string guides, I made dots at all the corners, this was easier but not quite as accurate. The kayak is a paper cutout I could move into position.


7-4-4, Happy Fourth of July. They set off 1/4 sticks of dynamite for noise up here.
Here is the whole mural laid out on the Brown coat with pigment but no binder, it includes the giornate cuts I plan on making.
I think a transparent plastic sheet would make a good pattern cartoon. I am setting one up now, tracing the lines I drew on the Brown coat and transferring the grid points. I'll use this to press in a set of outlines on the intonaco to paint with. This is the area heavy with detail.

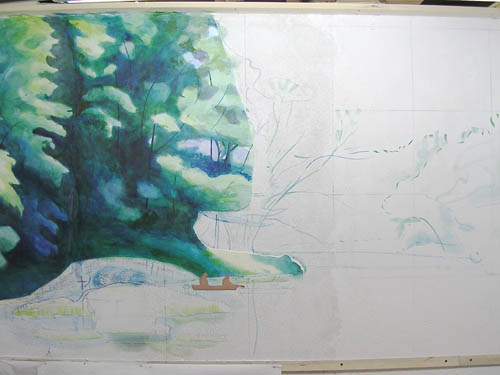
7-5-4, All day I've been drawing the cartoon. It's never ending.. I don't want to put 6M holes in it, I guess the spoon will have to do it's work and scribe in the lines as I go along.

transparent cartoon 2


This is the lower left foreground with the crane that lives here and a kayak. It's drawn in black marker on clear plastic.


7-7-4, 11:00, Giornate #3, 1 lime, 1 crushed limestone. To start laying the center top giornate, the sky area. First I had to wet the whole area plus until the shine stayed a while, with special treatment for the edges because it dries there first. The outline for the giornate on the brown coat was in red so it was fairly easy to follow. The first coat of intonaco was with a sponge with loose slip mortar. The second coat was spread as thin as I could. The third and final layer of the intonaco was smooth and level, 3/16 " thick max.

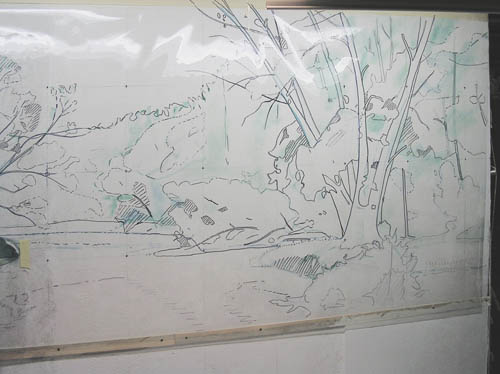
12:15 PM, finished laying #3. I'll let it set 10 minutes and really smooth it out. The transparent overlay is set and in place when the surface will just indent with finger tip pressure. About another 45 minutes. A spoon, a handle of a brush or a ballpoint pen. will scribe in the pattern outlines and giornate edges through the plastic.

TIP: The following step will be to cut the giornate edges with a two stroke "V" cut and remove the excess mortar in the V. Do this before painting to insure against accidents.

The intonaco is down, here shows the scribe lines and the cut being removed.

scribe and cuts


3:15 PM, the sky is finished, I can take a break. In the pigment I added titanium white and plenty of lime paste. On this same giornate are the trees on the left and right. I figure I have three hours to do them.

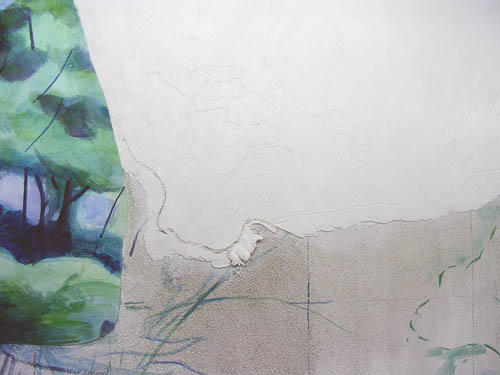
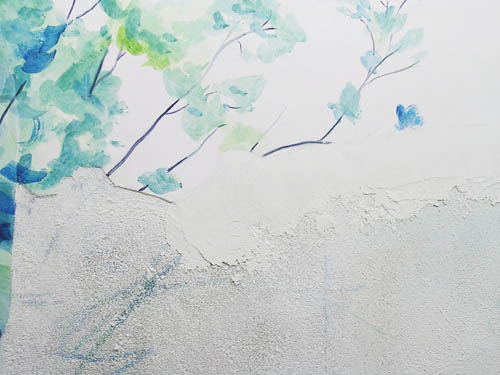
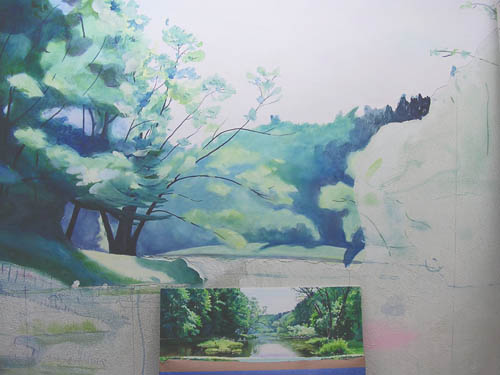
5:45, finished painting giornate #3, the sky is perfect. The delicate balance of cyan and magenta and yellow mixed with lime paste and titanium white made a beautiful sky of pink and blue.

TIP: While I was making the pink color I put some of the color that was too intense but still made with lime paste on the dry brown coat wall below. Two hours later the color was locked onto the wall solid and insoluble. Lime paint has been around a long time, lime white-wash is what it was called, it was a house paint. The Egyptians added color to it.

Secco painting needs a glue additive to adhere the pigment and a sealer. Contemporary was casein, egg yolk or lime. Techniques used by the ancients on dry walls include the 'Lost Art' of Cera Colla, which was both the glue and the gloss and made walls shine.

scribe and cuts


Giornate #4, 7-8-4. I made a batch of the 1:1 lime and crushed limestone.

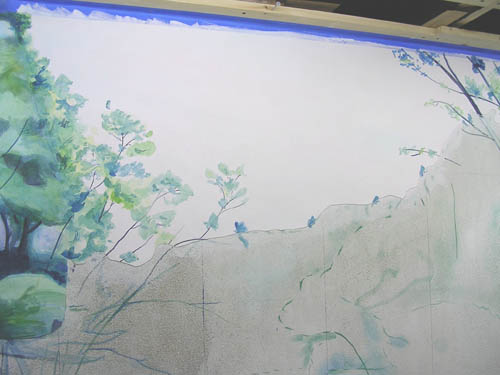
9:00 AM, wet the new wall in the morning until it holds a sheen. That took 2 hours by hand. Keep the forward and below areas wet with a spray bottle of lime water.
Spread on intonaco mortar slip with a 2" paint brush. Work it into all the edges and the flat area you are going to lay intonaco.
Lime touching yesterday's work will remove the paint even though it is set and insoluble with water.
While laying the edges, build up the mortar onto the edge and press it down and into the edge. Use the top edge as the hight guide by bending the trowel against it and pushing mortar under it. Don't leave any sand on the old giornate. If you are using a continuous technique with a gradual bevel, build the new section up to and onto the old section, press it flat and start painting again.

#4


Keep spraying your working area plus the next area every 15 minutes, if it's too dry it will suck the water out of the intonaco mortar and the bond will be lost causing shrinkage to show as cracks. Spray the working pile of mortar also and remix it to keep the right consistency in the whole little batch.

2:15 PM, finished laying #4 giornate with a flatter continuous beveled edge on the right and a 45 degree angle at the bottom. In this photo the test permanent pink hue made with lime on the dry brown coat can be seen. It is permanent.

giornate laid


4:15 PM, Still too wet to paint on, I'll wait another 45 minutes before transferring the cartoon.

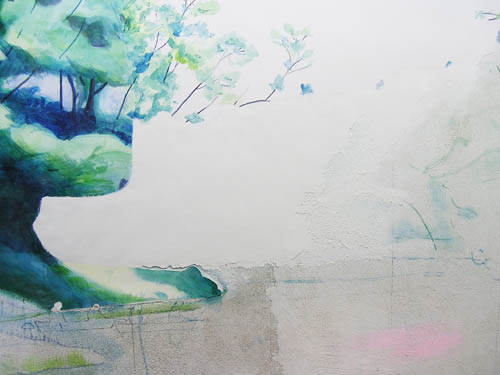
7:35 PM, I love the bristle brush, just like Steve on our fresco forum said. It's great.
I'm just scrubbing in the colors to lighten them, right into the surface of the mortar using lime water. Add more lime to move the surface so much you can change colors. Let it set a little while and press it smooth with a trowel if your making a smooth surface like I am.
I can press out the pressed in scribe lines too after replacing with them with paint guides.

Use a soft wash brush for dark colors. Do this first because it will take more than one wash. It's easy to paint light over dark when you mix lime paste into the lighter colors.

TIP: Here is how I know what color a wet color with lime in it a will dry into.
Start with a lime wet brush and thick lime paste and make a heavy paint consistency from the lime. Add pigment until you have the translucent full color. Add titanium white for the tint you want. The lime's effect to whiteness will be overridden by the titanium which won't change when it's dry. This mixed paint is permanent paint used on wet buon or dry secco murals.

I must say I'm using a lot of lime paste now that I'm confident that colors mixed with paste are permanent even if applied to mortar after it has set. That would be secco painting.
Here are two photos that show the wet and dry difference.
First photo. On the left bottom, wet lime loaded with pigment working up to lime, magenta pigment and white pigment. On the top right, wet magenta and white pigment only.
Second photo. Both samples are dry, they dried the same color. The addition of lime and white pigment to the base color dried the same color as the base color and white pigment only, just like while they were wet. The lime tint was upped. This shows that (1) color pigment and lime, (2) color pigment, lime and titanium, color pigment and titanium can be matched before they are dry. Adding lime paste is important but lime water and titanium will dry matching the wet color.

wet test dry test


9:45 PM, 4th giornate finished.

Finished 4th gornate


These links are to other 3 primary color paintings, the pigments are:

Dry Pigments;
Indian yellow PY153 from Zecchi,
Magenta PR122 from Sennelier,
Cyan PB15.3 from Senopia.

Food Coloring
The Easter Egg Coloring 6-pack.

Oil Paints,
Old Holland Indian Yellow Orange-side,
Daniel Smith Quinacridone Magenta PR122,
Grumbacher Thalo Blue, cyan PB15.3

Water Colors,
Daniel Smith New Gamboge PY153 Nickel Dioxine is the best Indian Yellow O/s pigment, bad name, good pigment.
Daniel Smith Quinacridone Magenta PR202 is more to the cyan side, bad choice.
I don't know why they won't use the most stable and magenta matching pigment PR122.
Grumbacher Thalo Crimson PV19 is more to the warm side, fugitive, bad choice.
Grumbacher Thalo Blue PB15.3

Children painting with Food Coloring Colors First Grade learning the primary colors.
Third grade art students using RCW primary colors
3 color examples Mixing the three transparent primary colors.
Lime Water Media 75 sq. foot Buon Fresco in 3 colors.
Lime Water Medium, Buon Fresco #1 in 3 colors.
Lime Water Medium, Buon Fresco #2 in 3 colors.
Hana Paintings with Maroger's Medium in 3 primary colors.
The Kaupo Hearts, Black Oil painting in 3 primary colors.
Egg Tempera Medium Still Life in 3 primary colors.
Water Color Painting with 3 primary colors.
Copal Medium with the RCW 3 Color Wheel


NEXT FRESCO PAGE, #53 Large mural continued, 2 of 4

PREVIOUS FRESCO PAGE, #51 Preparation for this mural

END PAGE Last Painting w/tips

VIEW THE PAINTING ON LOCATION COLOR FORUM FRESCO TOPIC


edu., art: Learn to paint anything in front of you with accurate colors. Use a new, different, color wheel and palette that matches the light and shadows with pigments.


3 Frescos DVD $35


JOIN PAINTING ON LOCATION COLOR FORUM